Popular Posts

Monday 26 September 2016

Week Five: Blueberry Bakewell Tart!


We visited Bakewell a few years ago on holiday.  While we were there, I tried the original recipe Bakewell pudding.  It was a very acquired taste!  Very stodgy and actually quite sickening.  I much prefer a light and crispy Bakewell tart - and this one was delicious!  I know there's been a lot of debate whether to ice or not to ice - I enjoyed it iced but I also enjoy it with just a scattering of flaked almonds.  :)


Ingredients

For the jam

For the sweet shortcrust pastry

For the filling

For the icing

Method

Step One: Make the Jam
I did not make the jam.  Sorry Mary!

Step Two: Make the Pastry
I whizzed the butter and flour in the food processor until it resembled breadcrumbs, then added the icing sugar, egg and 2 tablespoons of water and whizzed til smooth.  I usually put my pastry in the fridge BEFORE rolling, but Mary's recipe suggested to fridge AFTER rolling.  Definitely fridge BEFORE rolling!  It's quite a sticky dough and I had to add quite a bit of flour to stop it sticking which then made it dry.  If you fridge before rolling it firms up and is much easier to roll out.  


Step Three: Bake the Case
Once the dough is firm, roll it out to the thickness of a pound coin.  Use the base of your flan dish to check it is large enough.  I buttered and floured my flan dish, which worked very well and the pastry didn't stick at all.  I always fold in the edges of the pastry loosely, transfer to the dish and unfold again.  Carefully press the pastry into all the edges.  Do not trim the pastry until after baking.  I trimmed mine before and the pastry shrank while it baked.  Also, poke the base with a fork.  I didn't and a puff of air got caught under the base and made it misshapened.  Preheat the oven to 180C fan and line the case with baking paper and fill with baking beans.  Bake blind for 15 mins before removing the beans and paper and baking for a further 5 mins.  


Step Four: Fill the Case
Spread the case with jam (I used blueberry).  Mary recommends 4 tablespoons, but I might use more next time - I like a thick layer of jam!  Next make the frangipane.  Cream the butter and sugar together, then add the ground almonds, egg and almond extract.  (I actually didn't have any almond essence so I didn't use it - it still tasted fine)  Spoon the mixture into the pastry case.  Leave a large margin around the outside.  I spread mine right to the edge but it spread whilst cooking and spilled over the edge.  Reduce the oven to 160C fan and bake for 25-35 minutes.  Mine needed a bit longer - more like 40-45 mins.  It is ESSENTIAL that you leave the tart to cool in the tin completely before removing - mine was still warm and cracked when I tried to move it onto a plate.  


Step Five: Decorate
Mix the icing with the almond extract and 3 tablespoons of water.  (Again, I didn't have any almond extract.  It still tasted fine)  Make your icing as thick as possible whilst still being spreadable.  Mine was too thin and pooled in the centre.  Spoon 3 tablespoons of icing into a seperate bowl and mix with a colour of your choice.  The reason to use gel is because liquid food colouring dilutes the mixture too much.  Pipe very thick lines onto your icing - mine were too thin and wouldn't feather properly.  Drag a cocktail stick perpendicularly to your coloured lines, wiping the stick in between to maintain a clean line.  Leave to set (it will take a while, mine had to go in the fridge) then serve in slices.  I had mine on its own but it would also be nice with single cream.  


My score: 5/5 Reasonably easy and very impressive looking!  A quick and easy showstopping dessert - perfect for Sunday lunch! Don't bother making your own jam and if you're in a real rush buy pastry too!

Julia's Top Tip
  • Refrigerate your pastry before and after rolling to keep it super firm.
  • Prick the pastry with a fork to stop it puffing up.
  • Trim the pastry AFTER it is baked.
  • Leave a wide margin between the frangipane and the edge so it doesn't spill over.
  • Leave the tart to cool completely in the tin before transferring to a plate.
  • Make sure your icing is super thick so it doesn't pool in the middle.  
  • Experiment with different jam flavours - coordinate your icing colours with the jam!

Keeeeeeeep baking!


Wednesday 21 September 2016

Week Four: Churros!


I'm off to Barcelona!  I'm heading off next weekend so this week's challenge could only be churros!

I have made churros before, so I was at a little bit of an advantage (and I've eaten churros many times before!) but my churros have never looked pretty so that was my aim this week.  Also, presentation is an issue for me as a baker and I often feel my bakes taste wonderful but look 'informal' as Mary would say!

Full recipe here - http://www.bbcgoodfood.com/recipes/2459641/churros-with-chocolate-dipping-sauce 


Ingredients


For the sauce

  • 200g bar dark chocolate, not too bitter, broken into chunks
  • 100ml double cream
  • 100ml whole milk
  • 3 tbsp golden syrup
  • ½ tsp vanilla extract, if you have some

For the cinnamon sugar


Method

Step One: Make the Churros
Mix the butter and vanilla extract with 350ml boiling water.  Sift the flour and baking powder together and add a pinch of salt.  Then make a well and mix the wet and dry ingredients together quickly with a wooden spoon until smoooooooooth!  Leave to rest while you make the sauce.


Step Two: Make the Sauce
Easy peasy - melt all the ingredients together, either in the microwave, a bain-marie or in a saucepan.  I melted mine in a saucepan on the hob because the cream spreads the heat and ensures the chocolate doesn't burn.  


Step Three: Pipe the Churros
I tried piping butterfly churros - it did not work!  Too complex a shape.  So I went for party rings instead ;) I drew small circles onto baking paper.  I didn't have a round cutter so I drew round my baking powder pot!  Then I piped my ring-shaped churros using a star nozzle.  Finally, I chopped the baking paper into squares so that each churro ring was sitting on its own personal magic carpet!


Step Four: Cook the Churros
Fill a deep saucepan about 1/3 full of oil.  Heat the oil until a small piece of bread cooks in about 1 min.  Cover a tray with kitchen paper ready for your churros.  Using a slotted spoon, place your churros and baking paper into the oil.  (You can probably do 3-4 at a time)  After about a minute, flip the churros and paper.  The paper should come off and you can drag it out with the slotted spoon.  Drain the churros rings on the paper.  Once you've cooked them all, dip them in sugar and enjoy with the chocolate sauce!


My score: 5/5 super easy and quick!  Loved the piping - took them to the next level!  Absolutely delicious!

Julia's Top Tips

  • Watch the churros carefully when cooking.  They need to be a deep golden brown.  If they are not cooked long enough they will be doughy.  If they are cooked too long they will be oily.
  • Keep your design simple!  Circles work well, hearts etc...
  • Maybe try flavouring the dough?  I think orange essence would be DELISH
  • Try different dipping sauces,  Salted caramel, white chocolate, raspberry cream cheese... the options are endless!


Sunday 18 September 2016

Leftover Egg White Meringues!


So, I had some leftover egg whites from making the custard for the dampfnudel.  I could have made macarons - but I would have had to go out for ground almonds.  I could have made chocolate mousse - but I would have had to go out for double cream.  (Are you sensing a theme here?!)  So I decided to make meringues, as they only require egg whites and sugar :)

Full recipe here - http://www.bbcgoodfood.com/recipes/2445/ultimate-meringue


(Although I did modify it slightly...)


Ingredients


  • 4 large organic egg whites, at room temperature
  • 115g caster sugar
  • 115g icing sugar


Method

Step One: Make the Meringue
Preheat the oven to 100C.  Beat the egg whites until they look like a fluffy cloud.  Add the caster sugar one spoonful at a time until the mixture is thick and glossy.  Then sift in the icing sugar and fold.  (I then divided the mixture in two and added 1 tablespoon of cocoa powder to create a chocolate swirl.)


Step Two: Pipe the Meringue
I decided I wanted a chocolate swirl meringue, so I spooned my two mixtures into either side of my piping bag.  If I did this again, I would only make 1/3 of the mixture chocolate so as to have a more clearly defined swirl.  I drew small circles onto baking paper and piped my meringue into swirls.  I don't think I beat it enough though as it did not keep its shape perfectly.  Bake for 1 1/2 hours (check after 1 hour) until the meringue sounds hollow when you gently tap the bottom.  


Step Three: Assemble the Meringues
Finally, I made a quick chocolate buttercream.  I have to admit that I have no "recipe" for buttercream, I just add ingredients until it reaches the right consistency!  I always start with a tablespoonful of salted butter, otherwise I find icing is always too sweet.  Then I add icing sugar and beat until stiff.  Obviously, as this was a chocolate buttercream, I also added a tablespoon of cocoa powder.  When it gets stiff, I add a tablespoon of boiling water and beat until smooth.  As I said, I add different amounts of butter and icing sugar until I get a smooth, spreadable buttercream.  I matched up my meringues into similar sizes (I must get better at consistency!)  Then I piped buttercream onto one meringue and sandwiched it with the other.


My score: 5/5 Very easy, quick to make (you do need to be around long enough for them to cook though), absolutely delicious!  Need to be made with something that needs egg yolks though, unless you are happy to use the egg whites in a carton (I'm not)

Julia's Top Tips
  • Make sure the mixture is really stiff before you fold in the icing sugar
  • Only make 1/3 of the mixture chocolate for a clearer swirl.
  • Experiment with different colour and flavour combinations.  Maybe banana essence in the meringue with a caramel buttercream??  Or mint essence and chocolate ganache??  The possibilities are endless :)
  • Don't leave them in the oven too long - mine were a little overdone.
  • Do hide them from your husband if you want any left!


100 Days Til Christmas!!


I know I'm a bit late getting on the bandwagon as it was actually on Friday, but I still wanted to share my thoughts and plans.

I freaking LOVE Christmas!  Imagine the Spaceship scene from The Lego Movie but replace the word 'Spaceship' with 'CHRISTMAAAAAAS!!'


However, I do think the run up to Christmas starts waaaaaaaay too soon.  It's very easy to get Christmassed out, especially when the shops start stocking decorations and gifts in August!  I'm also a big fan of Halloween and Bonfire Night, so I do like to enjoy those before I start thinking about Christmas.  Also, my husband's birthday is the 23rd of November so I'm not even allowed to mention the C word til after that ;)

Having said that, as soon as the clock hits midnight on the 30th November, the Christmas decorations are up and the Christmas music is on!

So here are my plans for Christmas 2016...
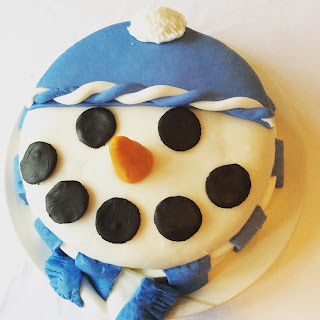
  • I no longer make a Christmas Cake as my husband hates it so there's no point making a wonderful cake just for myself!  Last year we made a chocolate Christmas cake (because I knew my husband would eat it) and decorated it as a QPR snowman.  This year, I'm planning on making miniature Christmas cakes, cupcake sized.
  • My dad LOVES florentines but I'm rubbish at making them.  Instead, I'm going to add nuts and fruits to the top of some chocolate brownies to make Florentine brownies.
  • I always make cherry and cranberry blondies - they're delish!
  • I really want to try making this gorgeous cake! http://www.bbcgoodfood.com/recipes/gingerbread-cake-caramel-biscuit-icing

  • I'd also like to have a go at something more traditional like stollen or lebkuchen.
Here's some Christmas baking ideas to tickle your taste buds...
http://www.bbcgoodfood.com/recipes/collection/christmas-baking

When I've finished all my Bake Off bakes, I'm planning on a Halloween post (red velvet cheesecake yum!), something for Bonfire night, my husband's 30th birthday cake, and then I'll get started on Christmas bakes!  I'll try for one a week.  Until then...  Keep baking!  


Saturday 17 September 2016

Breadxit


I am absolutely devastated.  As you may have guessed, Bake Off is my favourite programme on TV (is it that obvious??)  I feel very strongly that it is a quintessentially BBC programme and I think it will be ruined by Channel 4, not out of incompetence or malice, but because of a lack of understanding about what makes Bake Off, Bake Off.  I think it will lose it's old fashioned, British charm and become another fast-paced reality show.  

I don't think adverts, product-placement and constant recaps and previews will work, I think they'll be a lot more "sob stories" and fake emotional moments and fake drama.  I love the fact that Mel and Sue intentionally swear when the bakers are too upset so that the footage cannot be used.  I don't think new presenters will protect the contestants as well.  

Above all, I think the hardest thing for Channel 4 will be to preserve the warmth and joy of Bake Off without the Fab Four.  Mel and Sue have already (understandably) bowed out.  No-one can replace their perfect puns and genuine care for the contestants.  They're so sweet and lovely, always helping the bakers emotionally and with their bakes.  I really don't think Mary will move and Bake Off without Mary Berry is like life without sunshine.  I never warmed to Bake Off Creme de la Creme because the presenters and judges were different and it was more like Masterchef then my lovely Bake Off.  

Here are a few websites (mostly news and opinions) that I found very informative:
http://www.bbc.co.uk/news/entertainment-arts-37353262
http://www.recipesfromanormalmum.com/2016/09/14/coriander-falafel/ (Looks like a falafel recipe, is also Holly's opinion of Breadxit, written very beautifully)
https://www.theguardian.com/tv-and-radio/2016/sep/13/sue-perkins-and-mel-giedroyc-to-leave-great-british-bake-off  

I really am hoping desperately that Channel 4 somehow manage to keep the Bake Off Magic going - but I'm horribly worried that my beloved show now has a soggy bottom... :(

Week Three: Dampfnudel


Three technical challenges in a row!  I think it's purely because the technical challenge is always shorter, it's easier for me to achieve :)  I have NEVER heard of dampfundel but they sounded delicious and I knew I had to try some sweet German dumplings ;)

Full recipe here - http://www.bbc.co.uk/food/recipes/dampfnudel_36590


Ingredients


For the dampfnudel
            500g/1lb 2oz strong white flour, plus extra for dusting
            100g/3½oz caster sugar
            7g sachet fast-action yeast
            150ml/5fl oz full-fat milk, warmed
            2 large free-range eggs, lightly beaten
            70g/2½oz unsalted butter, melted
            1 lemon, finely grated zest only
            vegetable oil, for greasing
For the plum sauce
            4 ripe plums, roughly chopped and stones removed
            1 medium orange, juice only
            50g/1¾oz demerara sugar
            pinch ground cinnamon
For the vanilla sauce
            150ml/5fl oz full-fat milk
            150ml/5fl oz double cream
            3 large free-range egg yolks
            ½ tsp vanilla bean paste
            2 tsp plain flour
            50g/1¾oz caster sugar
For the poaching liquid
            25g/1oz unsalted butter
            150ml/5fl oz full-fat milk

            25g/1oz caster sugar

Wow!  Complicated!

Method

Step One: Make the Dampfnudel
Much easier than I thought!  A simple enriched dough.  You put the flour in the bowl, add the yeast and sugar to either side, then add the milk, eggs and butter.  Paul says you should use your hands, but I cheated and used the machine!  (Then you can tidy up/chop plums while it's going!)


When the dough is soft and smooth and sticking together, scatter over the lemon zest and knead that in.  Then it needs to be left to prove.  Oil a bowl and some clingfilm, then leave the dough in the bowl, top covered with clingfilm, for about an hour or until doubled in size.  (When I eventually remodel my kitchen I am totally having a proving drawer!) 


Step Two: Make Everything Else!

While the dough is proving, you've got time to make the plum sauce and custard - again, relatively easy.  I've made my own custard a few times - it's definitely worth the fuss, it tastes SO much better than shop bought.

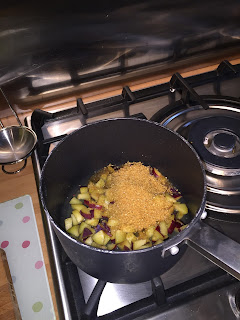
For the plum sauce, tip the plums, orange juice and sugar into a pan and cook over a low heat until the sugar has dissolved.  Whack the heat up to full and boil for 10 mins, squishing the mixture with a masher.  Then stir in the cinnamon and let it cool for a bit.  I whizzed mine in the food processor for a super smooth sauce.


For the custard, heat the milk and cream in a pan until it is just bubbling around the edges. Take it off the heat, then whisk the egg yolks, vanilla, flour and sugar in a bowl.  Then pour the milk and cream on top, whisking continuously - otherwise you'll end up with scrambled eggs! Pour it all back into the pan and cook on a really low heat for a few minutes, stirring the whole time.  Finally, pop it in a jug or bowl with clingfilm on so it doesn't get a skin.


Step Three: Cook the Dampfnudel

First, you need to make the dough into nudels.  Turn the dough out onto a lightly floured surface and turn inwards til the air is knocked out.  Divide the dough into 12 pieces and roll into balls.  (I will admit I was a loser and weighed them - it was the only way to get them equal!)  

Next, make the poaching liquid.  Heat the butter, milk and sugar in a large pan (Paul says a saute pan, I didn't have one so I used my poaching pan).  When the sugar has dissolved, take the pan off the heat, add the balls and let them sit for 15 minutes until (you've guessed it!) doubled in size.  Reduce the heat and cook for another 25-30 minutes.  Then remove the lid and keep cooking for another 5 minutes until their bottoms are carmarelised.  Finally, reheat the sauces and serve!


My score: 5/5 Easy and delicious!  They are time-consuming though, not something to bash out quickly.  I think they'd be delicious at Christmas time, maybe over the holidays when you have a whole day to leave things proving and muck around making sauces.

Julia's Top Tips
  • Do use a poaching pan or a saute pan - I used a ceramic dish to start with and it cracked!
  • Do use a pan that's big enough - my pan was small so they're all a bit misshapen.
  • Do experiment with different sauces - I also made a chocolate ganache sauce with leftover cream and it was DELICIOUS.
  • Don't leave your tin in reach of your cat - or this will happen!


Keeeeeeeep baking!