Popular Posts

Friday 30 December 2016

The Great St. Ives Bake Off!

You all know by now how obsessed I am with Bake Off, so when I saw an advert for the Great St. Ives Bake Off I knew I had to compete!  Even better, it was for charity - £5 to enter, then they sold your cake off for £2 a slice to raise even more money :)

Even if I hadn't won (which I did :p) I would still have been proud of myself.  This is the best-looking cake I've ever made, tasted amazing, and I basically devised the whole recipe myself by adapting 3 different recipes.  

Carry on reading to discover how you too can create an award winning cake! ;)


Ingredients 
Sorry all are in different measures!

For the brownie layer (adapted from Blissful Brownies)

  • 2oz unsalted butter
  • 1 1/2 oz plain flour
  • 1/4 tsp baking powder
  • 1 oz cocoa powder
  • 1 egg
  • 3 oz caster sugar
  • 1/2 tsp vanilla extract
  • 1/4 tsp almond extract
  • 2 1/2 oz glace cherries, halved

For the pink cake (adapted from Peek-A-Boo Cakes)

  • 100g unsalted butter
  • 100g caster sugar
  • 2 large eggs
  • 100g self raising flour
  • 20g ground almonds
  • a little pink food colouring (gel or paste not liquid)

For the white cake (adapted from Peek-A-Boo Cakes)

  • 400g unsalted butter
  • 400g caster sugar
  • 6 large eggs
  • 400g self raising flour
  • 200g ground almonds
  • 3 tsp almond extract
  • 6 tablespoons whole milk

To decorate

  • whole glace cherries
  • 3 cups salted butter
  • 9 cups icing sugar
  • 1 tablespoon vanilla essence
  • a little pink food colouring (gel or paste not liquid)
Method
Step One: Make the brownie layer
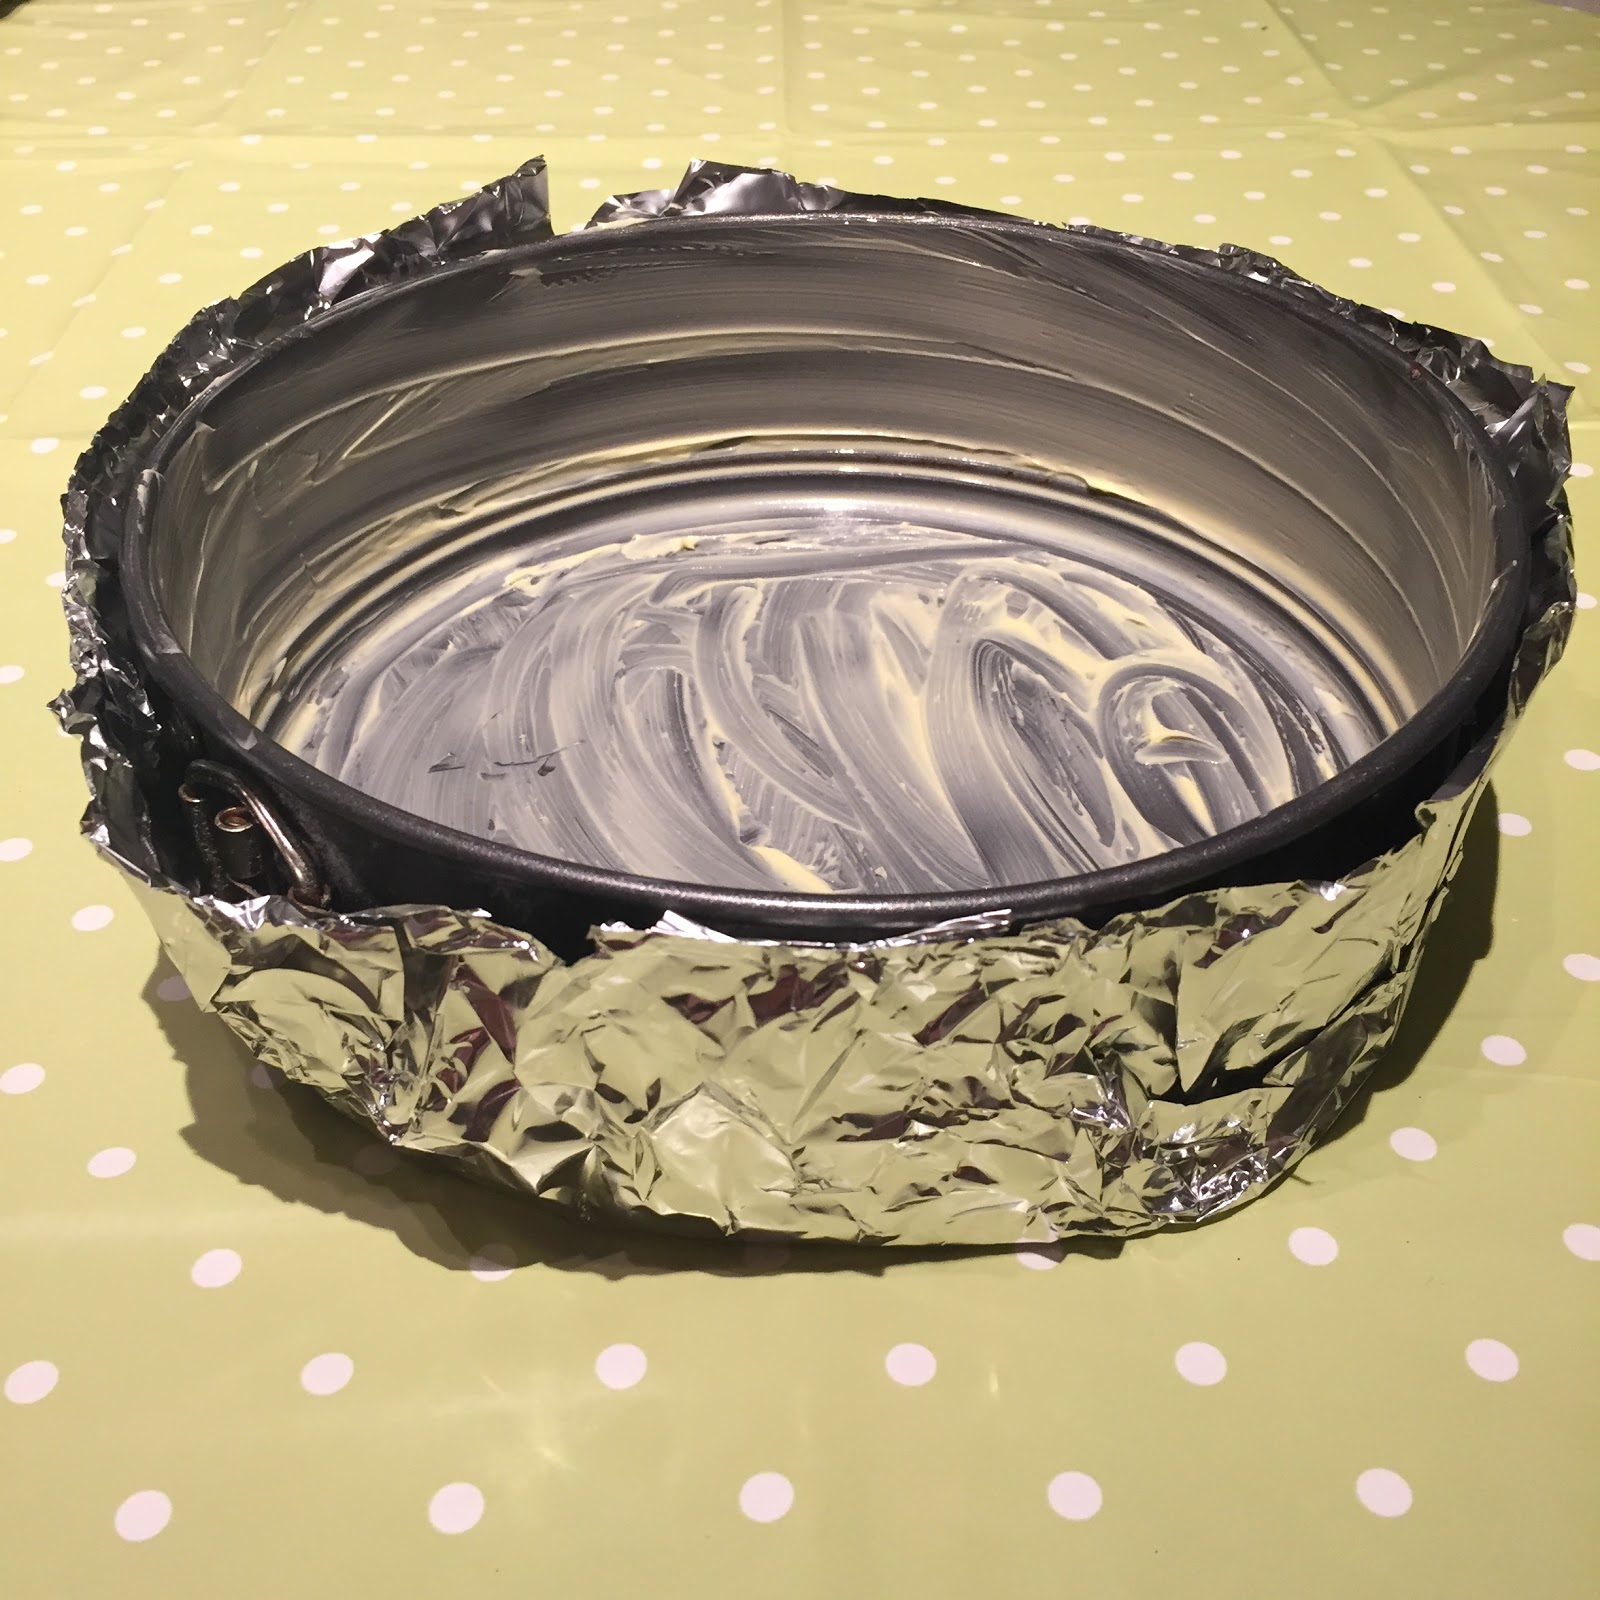
This layer makes the chocolate icing effect of the hidden cupcake design.  Grease and line a 7-inch cake pan and pre-heat the oven to 180C (160C fan).  
Melt the butter in a large saucepan over a medium heat.  When melted, remove from the heat and whisk in the cocoa, sugar, vanilla extract and almond extract.  Beat in the eggs last, as the mixture will be cooler and you won't end up with scrambled eggs!
Sift in the flour and baking powder and add the cherries.  Fold until just combined.  Pour into the tin and bake for about 15 mins, until just firm to the touch.  Leave to cool for 10 mins i the tin then transfer to a cooling rack.


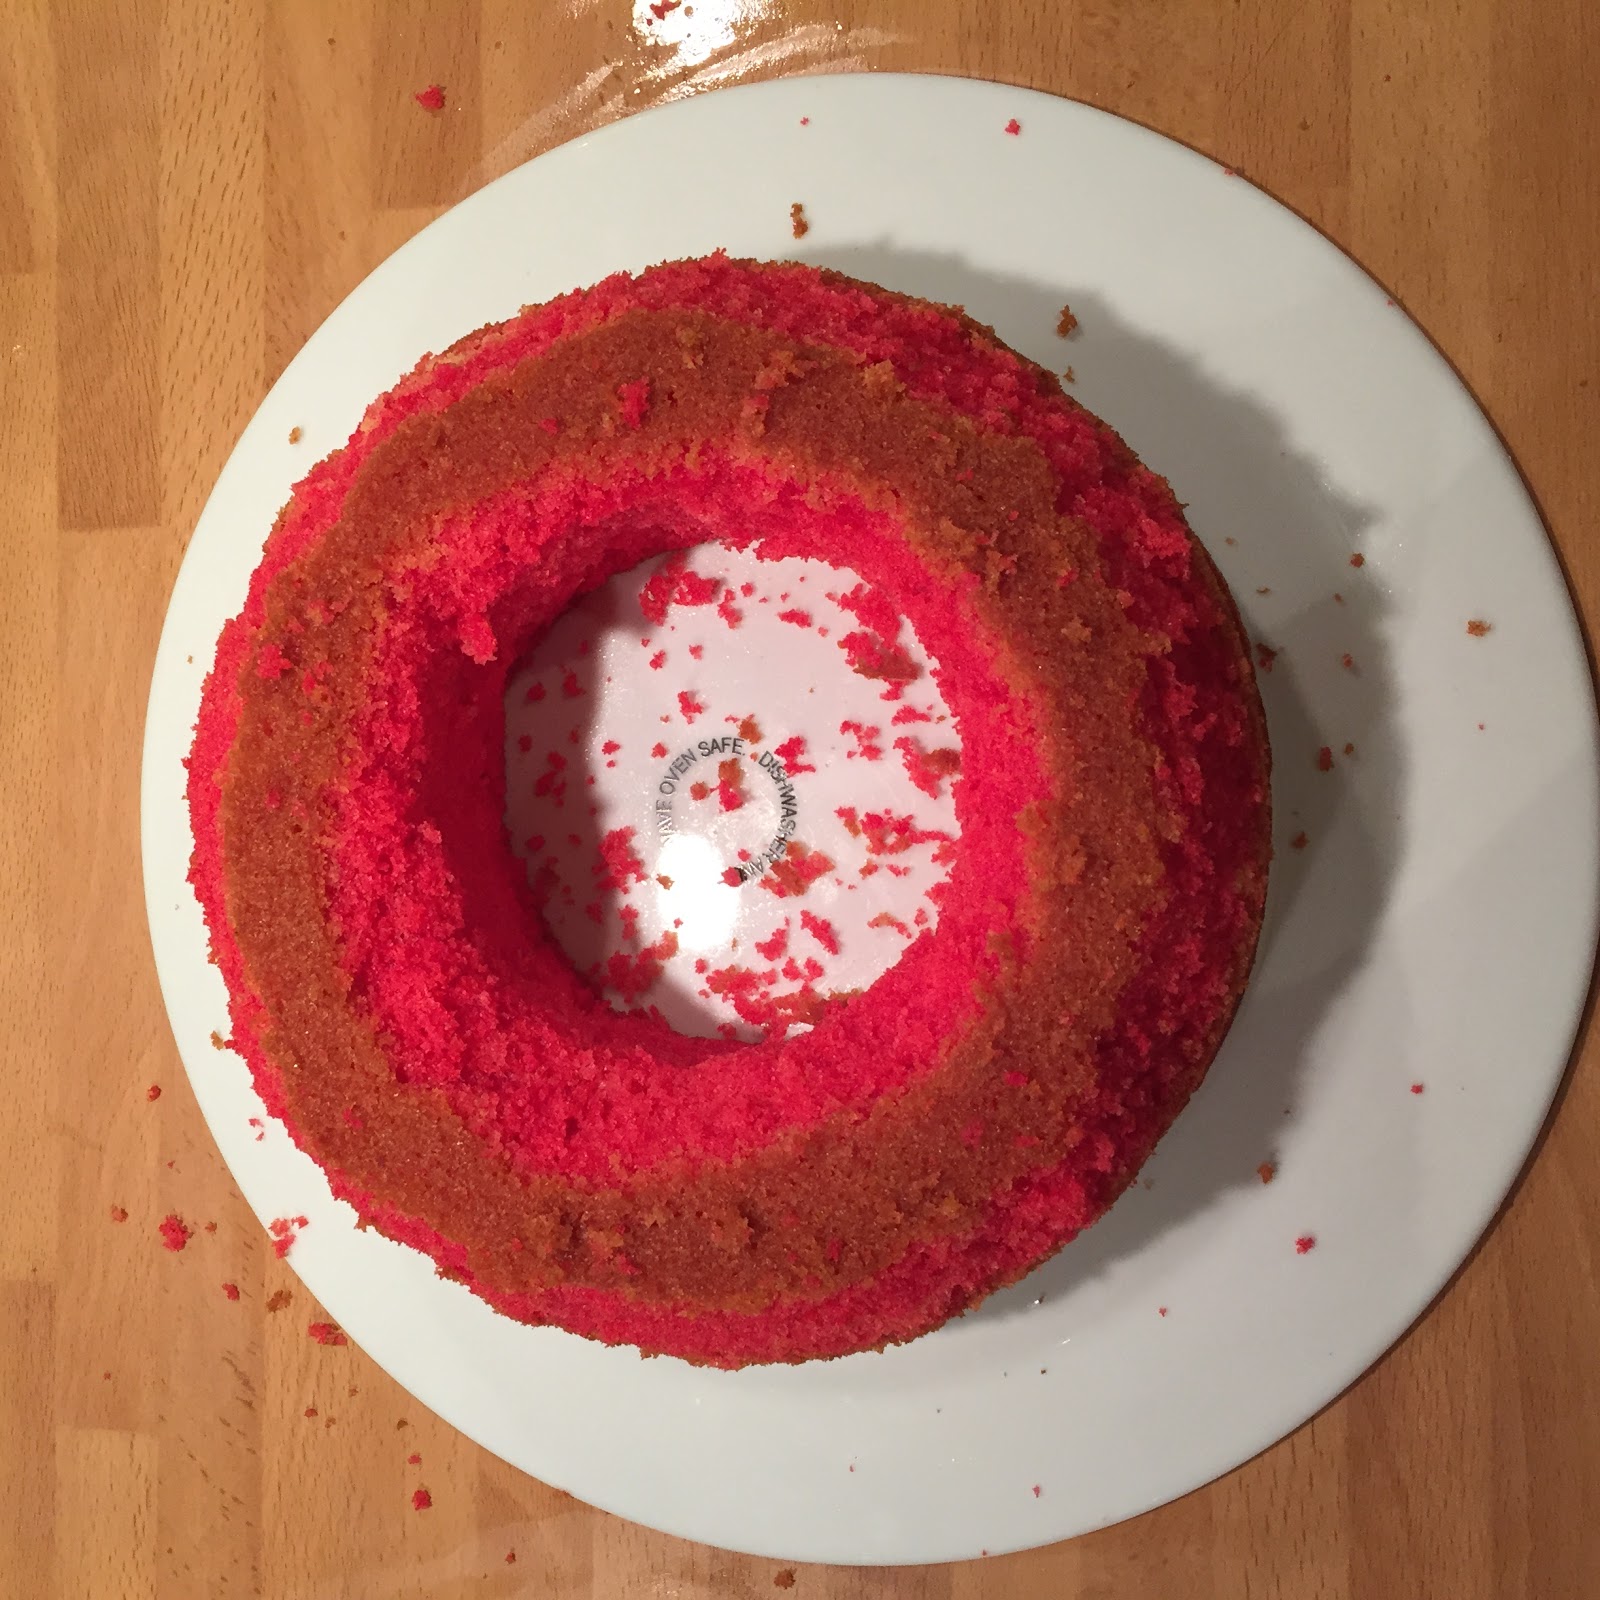
When it is completely cool, cut a circle in the centre of the brownie (3 inches in diameter)

Step Two: Make the pink layer
This layer makes the cupcake part of the hidden cupcake design.  Grease and line a 7-inch cake pan and pre-heat the oven to 160C (140C fan).  
Cream the butter and sugar until pale and creamy.  Add the eggs one at a time, along with a spoonful of flour to stop the mixture curdling.  Sift in the rest of the flour, then fold in the flour and ground almonds.  Add a decent amount of pink gel food colouring (a blob about the size of your little finger nail) and fold in so you get a deep pink colour mixture.  Pour into the pan and smooth, then bake for 25-30 mins until a skewer comes out clean.  


 Allow to cool in the tin for 10 mins then turn out onto a wire rack to cool completely.  Once cool, cut a circle in the centre of the cake (3 inches in diameter) and taper the sides (so that when it is cut it will look like a cupcake!)


Step Three: Make the white cake
This makes the rest of the cake.  Grease and line a 9-inch cake pan and pre-heat the oven to 160C (140C fan).  Cream the butter and sugar until pale and creamy.  Add the eggs one at a time, along with a spoonful of flour to stop the mixture curdling.  Sift in the rest of the flour, then fold in the flour, ground almonds, whole milk and almond essence.  


Pipe a thin layer into the cake pan, then place the pink layer (tapered side down) onto the white mix and push down gently.  Pipe more white cake mix around the outside of the pink cake and inside the hole.  When the white mix is level with the pink cake, place the brownie layer on top.  Pipe a very thin layer on top of the brownie, then place whole glace cherries all around the top of the brownie layer.  This will be the cherry on top of the hidden cupcake design.  Very carefully, so you don't disturb the cherries, pipe more white cake mix all over until the hidden design is, well, hidden!  


This is a biiiiiiiiiig cake, and will take 1 1/2 - 2 hours to bake.  Bake until a skewer inserted in the centre hole comes out clean - you can always put tin foil over the top to stop it from browning.  Leave to cool in the tin, then turn out onto a wire rack.

Step Four: Decorate!
I found this video very useful when learning to pipe ombre roses!


Also, this website was useful for the ratio of butter to icing sugar!
http://www.52kitchenadventures.com/2012/08/30/how-to-frost-an-ombre-rose-cake/

I beat the butter in my electric mixer first until it's really creamy.  Then I beat in the icing sugar a little at a time, otherwise it goes EVERYWHERE.  Use a little of the icing to give the cake a quick crumb coat.  This is just a thin layer of icing all over the cake to catch the crumbs, so that your top layer is clean and beautiful.
Split the remaining icing equally into 3 bowls.  Keep 1/3 pure and creamy, add 1 or 2 drops of pink gel food colouring to the 2nd bowl, and 3 or 4 drops to the 3rd bowl.  Mix until the colour is really even,  You can always add more colouring if you want a stronger colour - I wanted a very subtle, pastel ombre look.  
Starting at the bottom, using a Wilton 1M tip, fill your piping bag with the darkest pink.  Using an anti-clockwise motion, pipe the roses around the bottom of the cake, slightly overlapping.  (Watch the video above to see what I mean!)  Feel free to practise on some baking paper first, and you can always scrape off any roses that go wonky!
Once you have dark pink roses all the way round, repeat with the lighter pink for the middle row, then top the cake with cream roses.  The results are spectacular!


My score: 4/5 A real showstopper!  The only thing that stops it being 5/5 is the time and effort required - this is not a cake for beginners!

Julia's Top Tips

  • Read the recipe REALLY carefully - there's a lot of ingredients and actions to remember!
  • DON'T overmix any of the cakes or they won't rise and will be really rubbery.
  • You need a whole day to make this cake and a reasonable amount of expertise - this is not an easy cake, but it is worth it because it is very impressive and absolutely delicious!
I was especially proud of this cake because it was the most difficult and spectacular cake I had ever made - and I won star baker!  My prize was a tour of the local independent bakery, Tom's Cakes, plus a one-to one sugarcraft masterclass.  I'm going in January so I'll keep you updated!


Thursday 29 December 2016

Christmas Catch Up!

Wow! Just went through all my baking photos and realised how many recipes I have made over the last two months and NOT uploaded on here!

Here's a taster of what I will be posting over the next few days...


My go-to cookie recipe...


My charity Christmas cake...


Christmas cupcakes...


A hedgehog cake for my husband's 30th birthday...


A competition winner...


Hopefully I'll get it all done by the time I go back to work!  


Sunday 30 October 2016

This is Halloween!: Red Velvet Cheesecake Skyscraper


Halloween is my 2nd favourite holiday (Christmas is obviously my favourite!) and we always go all out every year!  Our annual Halloween party has costumes, decorations, quizzes... and, as always, cake!


This year, I decided to make a red velvet cheesecake skyscraper cake, inspired by Junior's cheesecake in NYC.  https://www.juniorscheesecake.com  My brother and I have been obsessed since our first visit - you must have at least one slice in your lifetime!

I am super chuffed with how it turned out (even though there were one or two pitfalls along the way!) and everyone agreed that it tasted phenomenal! 

IMPORTANT: You must make the cake and the cheesecake the day before so they can cool completely overnight before assembling!

I based the majority of the recipe on the Carrot Cake skyscraper book from Junior's recipe book - https://www.amazon.co.uk/Juniors-Cheesecake-Cookbook-die-York-style/dp/1561588806

The red velvet part I took from the BBC Good Food website - http://www.bbcgoodfood.com/recipes/freaky-finger-red-velvet-cake

Annoyingly, they do use different measuring systems due to Americanisms!

Ingredients

    For the red velvet cake

    • 175g soft butter , plus extra for greasing
    • 225g white caster sugar
    • 1 tsp vanilla extract
    • 3 large eggs , at room temperature
    • 1 tbsp red food colouring paste 
    • 200g plain flour
    • 50g cocoa powder 
    • 1½ tsp bicarbonate of soda

    • ½ tsp baking powder
    • ¼ tsp salt
    • 150g pot low-fat plain yoghurt , loosened with 2 tbsp milk

    For the cheesecake

    • 1 1/2lbs of full fat cream cheese
    • 1 1/3 cups caster sugar
    • 3 tbsps cornstarch
    • 1 tbsp pure vanilla extract
    • 2 extra large eggs (equivalent to 8tbsp of beaten egg)
    • 2/3 cup heavy or whipping cream

    For the cream cheese frosting

    • 1 1/2lbs of full fat cream cheese
    • 1 cup unsalted butter (I used salted)
    • 1 1/2lbs of icing sugar
    • 1 tbsp pure vanilla extract
    • 1/4 cup heavy or whipping cream

    Method

    Step One: Make the Red Velvet Cake
    This is one of my favourite kinds of cake!  Heat the oven to 180C (160C fan) and grease and sugar a 9-inch cake pan.  Cream the butter, sugar and vanilla, then add the eggs, one at a time, beating after each.  If your mixture curdles, add 1 spoonful of flour and it will sort it out!


    • Beat in the colouring until combined.  Sift all the dry ingredients together, then fold in HALF the dry ingredients (capitalised because I didn't read the instructions properly and chucked it all in!) and HALF the yoghurt and milk mix.  THEN fold in the other HALF of the dry ingredients and the other HALF of the yoghurt and milk mix.  


    Finally, tip it into the tin and level it off.  Bake for 25-30 mins until springy and a skewer comes out clean.  Cool in the tin for 10 mins, then turn out onto a wire rack to cool overnight.


    Step Two: Make the Cheesecake
    Preheat the oven to 180C (160C fan) and butter the bottom and sides of a 9 inch springform pan.  Wrap the outside of the pan in tin foil.  Mix 8oz of cream cheese, 1/3 cup of sugar and the cornstarch with an electric mixer on a low speed until creamy.  Add the rest of the cream cheese (a bit at a time) then scrape down the sides.  Increase the speed to medium and add the rest fo the sugar and the vanilla then the eggs (1 at a time).  Beat in the cream until completely blended.  Spoon the mixture into the pan and place it into a large shallow roasting pan full of hot water - it should come about halfway up the sides of your cheesecake pan.  Bake for about 1 1/4 hours until lightly brown.


    (Mine was too brown!)  Cool in the tin for at least 2 hours, then take off the foil and wrap the whole cheesecake and pan in cling film.  Refrigerate until completely cold, then place in the freezer overnight.

    Step Three: Make the Buttercream
    Beat the cream cheese and butter together on high speed until creamy.  I always use salted butter in all my buttercreams - it offsets the sweetness of the icing sugar.  (Also, mix icing in a large bowl because otherwise icing sugar goes everywhere.)  Add the icing sugar slowly, folding in slightly before beating (this stops it from flying everywhere).  Add the vanilla and the cream, then mix until smooth.  Clingfilm and refrigerate overnight so it's nice and firm.  


    Step Four: Cheesecake - Assemble!
    Take everything out of the fridge/freezer ten minutes before you want to assemble the cake. Cut the cake in half horizontally.  Put one half onto your serving plate and spread the top with some of the icing.  Remove the cheesecake from it's pan and place on top and spread with more buttercream.  Finally, lay the other half of the cake on top.  Cover the whole thing with the rest of the buttercream.

    To create the spider design, pipe concentric circles on top with red gel icing.  Using a skewer, drag the tip of the skewer from the centre to the outside to create the spider web.


    My score: 5/5 Relatively easy, but does need some forward planning.  A real showstopper!  Can be adapted to all kinds of different flavours - I've made a carrot cake one and a chocolate one before.  :)

    Julia's Top Tips

    • Be organised!  Make everything the day before your party, assemble it the afternoon of your party and store in the fridge.
    • Experiment with different flavour and designs.  You could try carrot cake, chocolate cake, funfetti cake, caramel cake...  the opportunities are endless!
    • Always use salted butter in your buttercream!

    Happy Halloween!!


    Saturday 29 October 2016

    Bake Off Final: My Thoughts and Opinion


    Wednesday was a very bittersweet night for me.  As you may have guessed, I am obsessed with Bake Off, it's my absolutely favourite show and I love every iota of it.  I love the witty banter of Mel and Sue, I love Paul's mysterious steel glare and, of course, I love the Queen of Baking, Mary Berry.  In a TV world of drama and sob stories, I love that Bake Off is simple, classic and quintessentially British.  

    I am gutted that Bake Off is leaving the BBC.  It is already ruined because 3/4 of the Fab Four will be missing, it will be made even worse by endless ads and product placement and recaps and cliffhangers.  I feel every member of the Fab Four made the right move for themselves - Mel and Sue and Mary did the right thing by staying with BBC; I also think Paul did the right thing staying with Bake Off.  

    I am also devastated on a personal level.  The whole purpose of this baking blog was to prepare me to enter the Great British Bake Off.  I had downloaded the entry form two years previously, but did not have any pastry, bread or patisserie experience.  Therefore, the aim of this blog was to expand and refine my baking skills, in preparation for applying for next year's Bake Off.  Unfortunately, my Bake Off dream will never be acheived.  I will not enter any Bake Off that does not include Mary Berry.  Bake Off without Mary Berry is like a cake without eggs - flat and joyless.  

    I'm still proud of myself - I've acheived a lot and really pushed myself and expanded into whole areas of baking I'd never experienced before.  I've got all my fingers and toes crossed that Mary, Mel, Sue and the BBC devise a new baking competition - I'll be the first in line if that eventually happens!

    Enough moaning - back to the final!

    I was in very mixed feelings about the result.  I'm a big Andrew fan - I love his precision, creativity and talent.  However, on the day, I do think Candice deserved to win.  I've never warmed to Candice, disliking her tendency to alway go over the top, always have to give everything a 'twist; and always presenting things in a ridiculous way (the piano and the bird cage spring to mind).  Personal opinion aside, she is an excellent baker and definitely does not deserve the internet backlash she recieved.  Whether you like or dislike someone, cyber bullying is cyber bullying and attacking someone personally is disgusting and childish.  I am impressed with anyone who can bake in a little black dress and wedge heels and not get a speck of flour on them!  Having said that, I adore Andrew and was very disappointed on his behalf.  

    All in all, a very emotionally mixed night for me.  I am very sad that something so wonderful has come to an end whilst still in its prime.  I think all that is left for us to do is what I always do - keep baking!


    Week Ten: Classic Victoria Sponge

    Will update asap!

    Week Nine: Fondant Fancies

    Never again!  Just buy them!

    Full recipe here: http://www.bbc.co.uk/food/recipes/fondant_fancies_88368


    Ingredients

    For the sponge

    For the buttercream

    For the marzipan topping

    For the icing and decoration


    Method

    Step One: Make the Sponge
    For some stupid reason, I decided that I was going to make 3 different cakes, 3 different toppings and 3 different icings...  I am an idiot.

    I made caramel, chocolate and confetti sponges.  Mary's a big advocate of the all in one method for sponge, but I always cream my butter and sugar first. Always sift the flour too.  After you've creamed the butter and sugar 'til it's pale and fluffy, add the eggs one at a time, along with a tablespoon of sifted flour, to stop the mixture from curdling.  Don't do what I did, which was to divide the mixture into thirds and add caramel flavouring to 1/3, a tablespoon of cocoa powder to another 1/3 and hundreds and thousands to the last 1/3.  

    Preheat the oven to 160C (140C fan).  Grease and line your tin.  I used my magic tin which means I didn't need to do any cutting - the one thing I did right in this whole disaster!  If you're using a magic tin like mine, grease well up the sides and pipe your mix in, otherwise you just end up with a mess.  Smooth the mix so it is level, then bake for 40 minutes or until a skewer comes out clean.


    Step Two: Top the Cakes

    Let the cake cool in the tin for 10 mins, then turn out onto a wire rack and cool completely. If you want to speed the cooling process, pop the cake in the fridge for half an hour.  While the cake is chilling, make the buttercream.  DON'T do what I did, which was to make chocolate ganache and caramel to top your fancies with.  It sounds amazing but IT DOES NOT WORK.  Repeat after me - just buy them from a shop!

    If you are fool enough to make these yourself, beat the butter until it is really soft, then add the icing sugar and whatever flavourings you want.  Cut the cakes into equal squares and trim the tops off so you have a nice flat top.  I didn't and my fancies were grotesque!  I stupidly made 3 different butter creams - vanilla, caramel and chocolate.  Please don't waste your life doing this!  

    Once you've cut and trimmed your fancies to the right size, spread a thin layer of buttercream over the tops and the sides - known as the "crumb coat" as it stops crumbs from the cake spoiling your fondant finish.  I didn't bother with the marzipan on top - life's too short.  Then pipe a blob of buttercream (don't use ganache or caramel, they won't hold their shape) on top of the cakes.  Put the iced and topped cakes into the fridge to set.


    Step Three: Cover the cakes in fondant
    Just give up now.  Chuck it all in the bin, go to to the corner shop and buy a box of French Fancies for a quid.  If you really enjoy torturing yourself, cut the fondant icing into small cubes and place in your free-standing mixer.  Add a splash of water and start to mix.  Gradually add more water until the icing breaks down and becomes liquid.  Add the amount of liquid that Mary says - no more or it will run off and create a new Jackson Pollock masterpiece in your kitchen, like mine did!


    Jane's method on GBBO was the most efficient - stand your fancy on a masher, then use a spoon to drizzle fondant all over it.  Do not make my mistake and try to make different flavour or colour fondant, it's a waste of time and makes your fondant too runny.  Leave the fancies to set on a cooling rack, then drizzle with melted chocolate.

    This is how mine turned out!  Beautiful, eh?


    My score: 0/5 Never EVER make these!  Just buy them and pretend you did!

    Julia's Top Tips
    • Don't make them.
    • Don't waste your life.
    • Buy them from a shop.

    Keeeeeep Baking!