Popular Posts
-
Hi! My name's Julia, and I'm addicted to the Great British Bake Off! I looooooooooove Paul and Mary. I want to live with t...
-
By now, everyone knows of my great obsession with Paul, Mary and the Great British Bake Off! I've decided that I need an ...
-
As many of you know, I am an avid Bake Off fan. My mum very kindly got me the Bake Off book for Chrimbo, and I have decided to set myself a...
-
After my burnt banana bread disaster I turned back to my absolute fail safe easy peasy scrummy chocolate chip cookie recipe. RECIPE Cream 75...
-
CATCH UP For Bonfire night I made my first foray into the world of cake pops! Toffee Apple Cake Pops I did the full recipe and ended up with...
-
Lorraine Pascale is my new baking crush. I made her oreo brownies and they were DELISH! Can't wait to see what comes up on new series!...
-
I thought I'd combine these two recipes into one post as they are SO easy! I made cheese finger sandwiches and chocolate spread finger...
-
I am a relative novice when it comes to bread - so far I've made 4 loaves of bread, 1 batch of white rolls, and 1 batch of wholemeal...
-
Ok, I have decided to honour the 3rd annual Bake Off by trying at least one challenge from each show. (I know I should do all 3 - but I...
-
I am sad to announce that my first ever vegan bake off went VERY badly! It tasted absolutely delicious, but the texture was very soggy ...
Saturday, 29 October 2016
Bake Off Final: My Thoughts and Opinion
Wednesday was a very bittersweet night for me. As you may have guessed, I am obsessed with Bake Off, it's my absolutely favourite show and I love every iota of it. I love the witty banter of Mel and Sue, I love Paul's mysterious steel glare and, of course, I love the Queen of Baking, Mary Berry. In a TV world of drama and sob stories, I love that Bake Off is simple, classic and quintessentially British.
I am gutted that Bake Off is leaving the BBC. It is already ruined because 3/4 of the Fab Four will be missing, it will be made even worse by endless ads and product placement and recaps and cliffhangers. I feel every member of the Fab Four made the right move for themselves - Mel and Sue and Mary did the right thing by staying with BBC; I also think Paul did the right thing staying with Bake Off.
I am also devastated on a personal level. The whole purpose of this baking blog was to prepare me to enter the Great British Bake Off. I had downloaded the entry form two years previously, but did not have any pastry, bread or patisserie experience. Therefore, the aim of this blog was to expand and refine my baking skills, in preparation for applying for next year's Bake Off. Unfortunately, my Bake Off dream will never be acheived. I will not enter any Bake Off that does not include Mary Berry. Bake Off without Mary Berry is like a cake without eggs - flat and joyless.
I'm still proud of myself - I've acheived a lot and really pushed myself and expanded into whole areas of baking I'd never experienced before. I've got all my fingers and toes crossed that Mary, Mel, Sue and the BBC devise a new baking competition - I'll be the first in line if that eventually happens!
Enough moaning - back to the final!
I was in very mixed feelings about the result. I'm a big Andrew fan - I love his precision, creativity and talent. However, on the day, I do think Candice deserved to win. I've never warmed to Candice, disliking her tendency to alway go over the top, always have to give everything a 'twist; and always presenting things in a ridiculous way (the piano and the bird cage spring to mind). Personal opinion aside, she is an excellent baker and definitely does not deserve the internet backlash she recieved. Whether you like or dislike someone, cyber bullying is cyber bullying and attacking someone personally is disgusting and childish. I am impressed with anyone who can bake in a little black dress and wedge heels and not get a speck of flour on them! Having said that, I adore Andrew and was very disappointed on his behalf.
All in all, a very emotionally mixed night for me. I am very sad that something so wonderful has come to an end whilst still in its prime. I think all that is left for us to do is what I always do - keep baking!
Week Nine: Fondant Fancies
Never again! Just buy them!
Full recipe here: http://www.bbc.co.uk/food/recipes/fondant_fancies_88368
Method
Step One: Make the Sponge
For some stupid reason, I decided that I was going to make 3 different cakes, 3 different toppings and 3 different icings... I am an idiot.
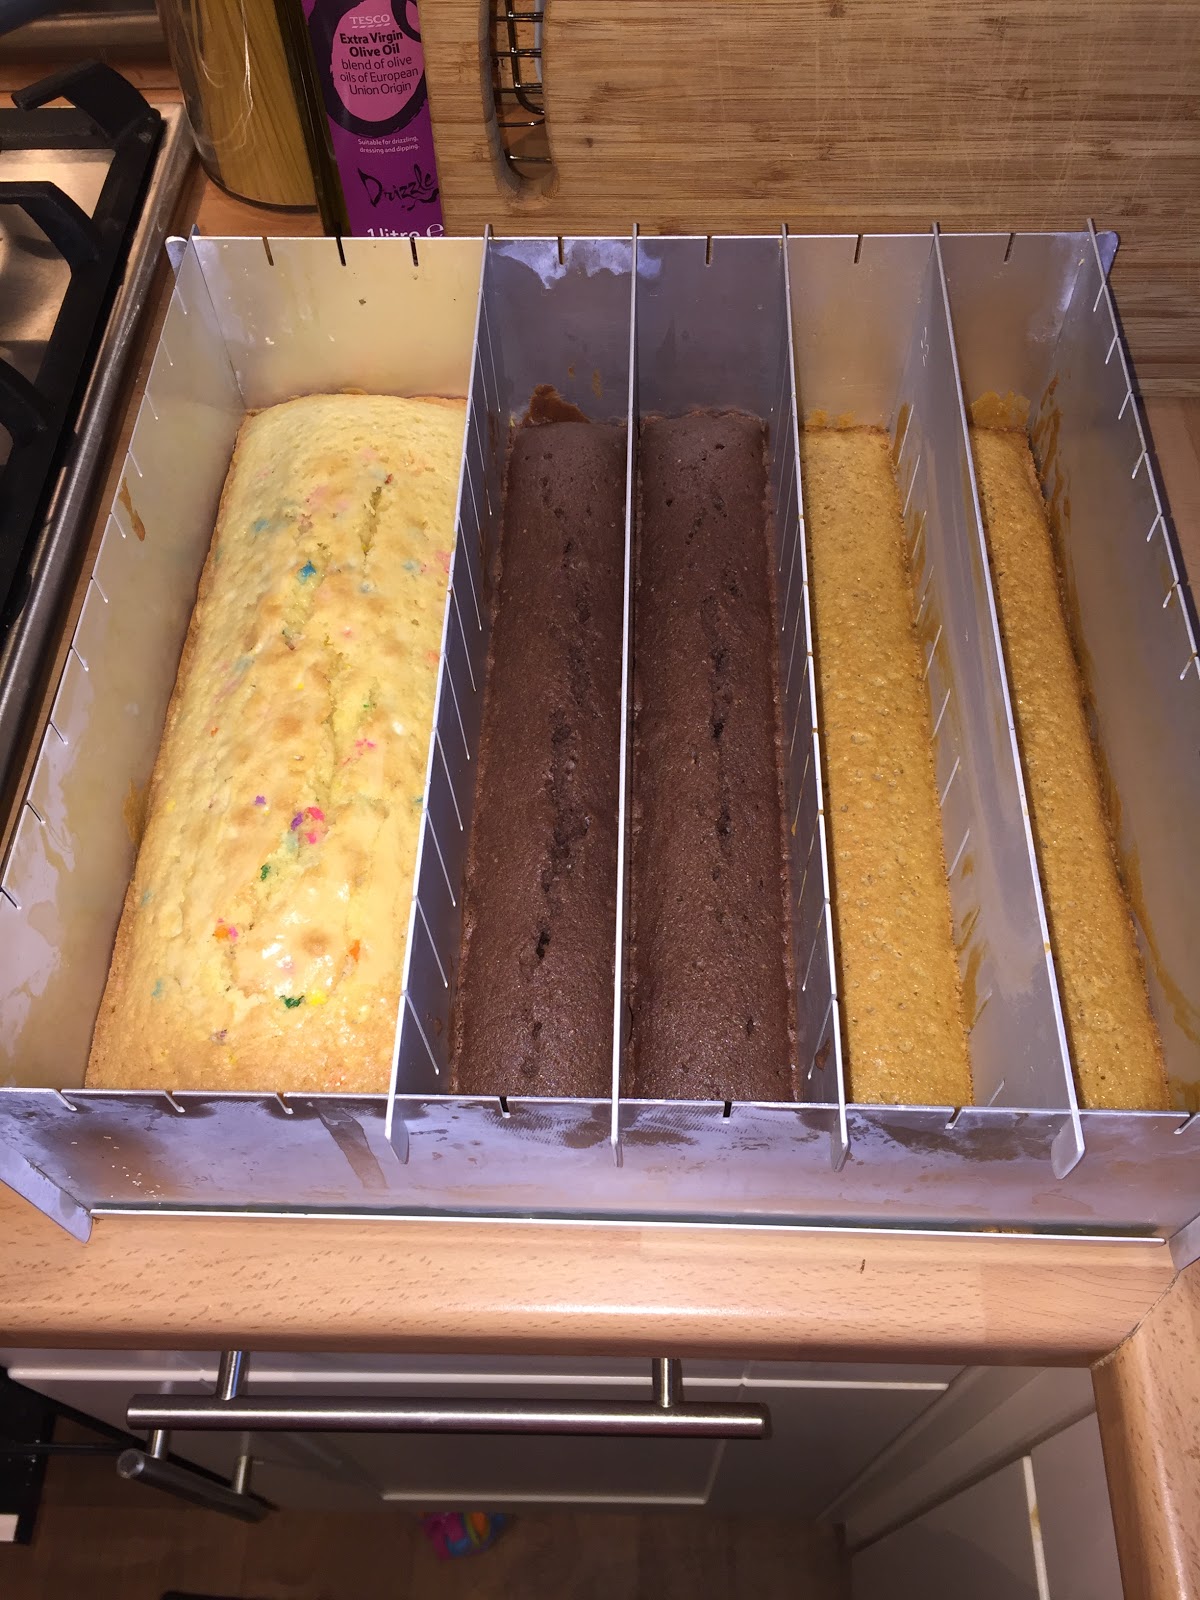
I made caramel, chocolate and confetti sponges. Mary's a big advocate of the all in one method for sponge, but I always cream my butter and sugar first. Always sift the flour too. After you've creamed the butter and sugar 'til it's pale and fluffy, add the eggs one at a time, along with a tablespoon of sifted flour, to stop the mixture from curdling. Don't do what I did, which was to divide the mixture into thirds and add caramel flavouring to 1/3, a tablespoon of cocoa powder to another 1/3 and hundreds and thousands to the last 1/3.
Preheat the oven to 160C (140C fan). Grease and line your tin. I used my magic tin which means I didn't need to do any cutting - the one thing I did right in this whole disaster! If you're using a magic tin like mine, grease well up the sides and pipe your mix in, otherwise you just end up with a mess. Smooth the mix so it is level, then bake for 40 minutes or until a skewer comes out clean.
Step Three: Cover the cakes in fondant
Just give up now. Chuck it all in the bin, go to to the corner shop and buy a box of French Fancies for a quid. If you really enjoy torturing yourself, cut the fondant icing into small cubes and place in your free-standing mixer. Add a splash of water and start to mix. Gradually add more water until the icing breaks down and becomes liquid. Add the amount of liquid that Mary says - no more or it will run off and create a new Jackson Pollock masterpiece in your kitchen, like mine did!
Keeeeeep Baking!
Full recipe here: http://www.bbc.co.uk/food/recipes/fondant_fancies_88368
Ingredients
For the sponge
- 225g/8oz self-raising flour
- 225g/8oz baking spread or softened butter
- 225g/8oz caster sugar
- 1 lemon, grated rind only
- 4 free-range eggs
For the buttercream
- 250g/9oz unsalted butter, softened
- 200g/7oz icing sugar
For the marzipan topping
- 3 tbsp apricot jam
- 200g/7oz marzipan
For the icing and decoration
- 1 kg/2lb 4oz white fondant icing
- 150ml/5fl oz water
- food colouring (any colour)
- flavouring (any flavouring)
- 100g/3½oz dark chocolate
Method
Step One: Make the Sponge
For some stupid reason, I decided that I was going to make 3 different cakes, 3 different toppings and 3 different icings... I am an idiot.
I made caramel, chocolate and confetti sponges. Mary's a big advocate of the all in one method for sponge, but I always cream my butter and sugar first. Always sift the flour too. After you've creamed the butter and sugar 'til it's pale and fluffy, add the eggs one at a time, along with a tablespoon of sifted flour, to stop the mixture from curdling. Don't do what I did, which was to divide the mixture into thirds and add caramel flavouring to 1/3, a tablespoon of cocoa powder to another 1/3 and hundreds and thousands to the last 1/3.
Preheat the oven to 160C (140C fan). Grease and line your tin. I used my magic tin which means I didn't need to do any cutting - the one thing I did right in this whole disaster! If you're using a magic tin like mine, grease well up the sides and pipe your mix in, otherwise you just end up with a mess. Smooth the mix so it is level, then bake for 40 minutes or until a skewer comes out clean.
Step Two: Top the Cakes
Let the cake cool in the tin for 10 mins, then turn out onto a wire rack and cool completely. If you want to speed the cooling process, pop the cake in the fridge for half an hour. While the cake is chilling, make the buttercream. DON'T do what I did, which was to make chocolate ganache and caramel to top your fancies with. It sounds amazing but IT DOES NOT WORK. Repeat after me - just buy them from a shop!
If you are fool enough to make these yourself, beat the butter until it is really soft, then add the icing sugar and whatever flavourings you want. Cut the cakes into equal squares and trim the tops off so you have a nice flat top. I didn't and my fancies were grotesque! I stupidly made 3 different butter creams - vanilla, caramel and chocolate. Please don't waste your life doing this!
Once you've cut and trimmed your fancies to the right size, spread a thin layer of buttercream over the tops and the sides - known as the "crumb coat" as it stops crumbs from the cake spoiling your fondant finish. I didn't bother with the marzipan on top - life's too short. Then pipe a blob of buttercream (don't use ganache or caramel, they won't hold their shape) on top of the cakes. Put the iced and topped cakes into the fridge to set.
Step Three: Cover the cakes in fondant
Just give up now. Chuck it all in the bin, go to to the corner shop and buy a box of French Fancies for a quid. If you really enjoy torturing yourself, cut the fondant icing into small cubes and place in your free-standing mixer. Add a splash of water and start to mix. Gradually add more water until the icing breaks down and becomes liquid. Add the amount of liquid that Mary says - no more or it will run off and create a new Jackson Pollock masterpiece in your kitchen, like mine did!
Jane's method on GBBO was the most efficient - stand your fancy on a masher, then use a spoon to drizzle fondant all over it. Do not make my mistake and try to make different flavour or colour fondant, it's a waste of time and makes your fondant too runny. Leave the fancies to set on a cooling rack, then drizzle with melted chocolate.
This is how mine turned out! Beautiful, eh?
My score: 0/5 Never EVER make these! Just buy them and pretend you did!
Julia's Top Tips
- Don't make them.
- Don't waste your life.
- Buy them from a shop.
Keeeeeep Baking!
Monday, 17 October 2016
Week Eight: Tudor Jumbles
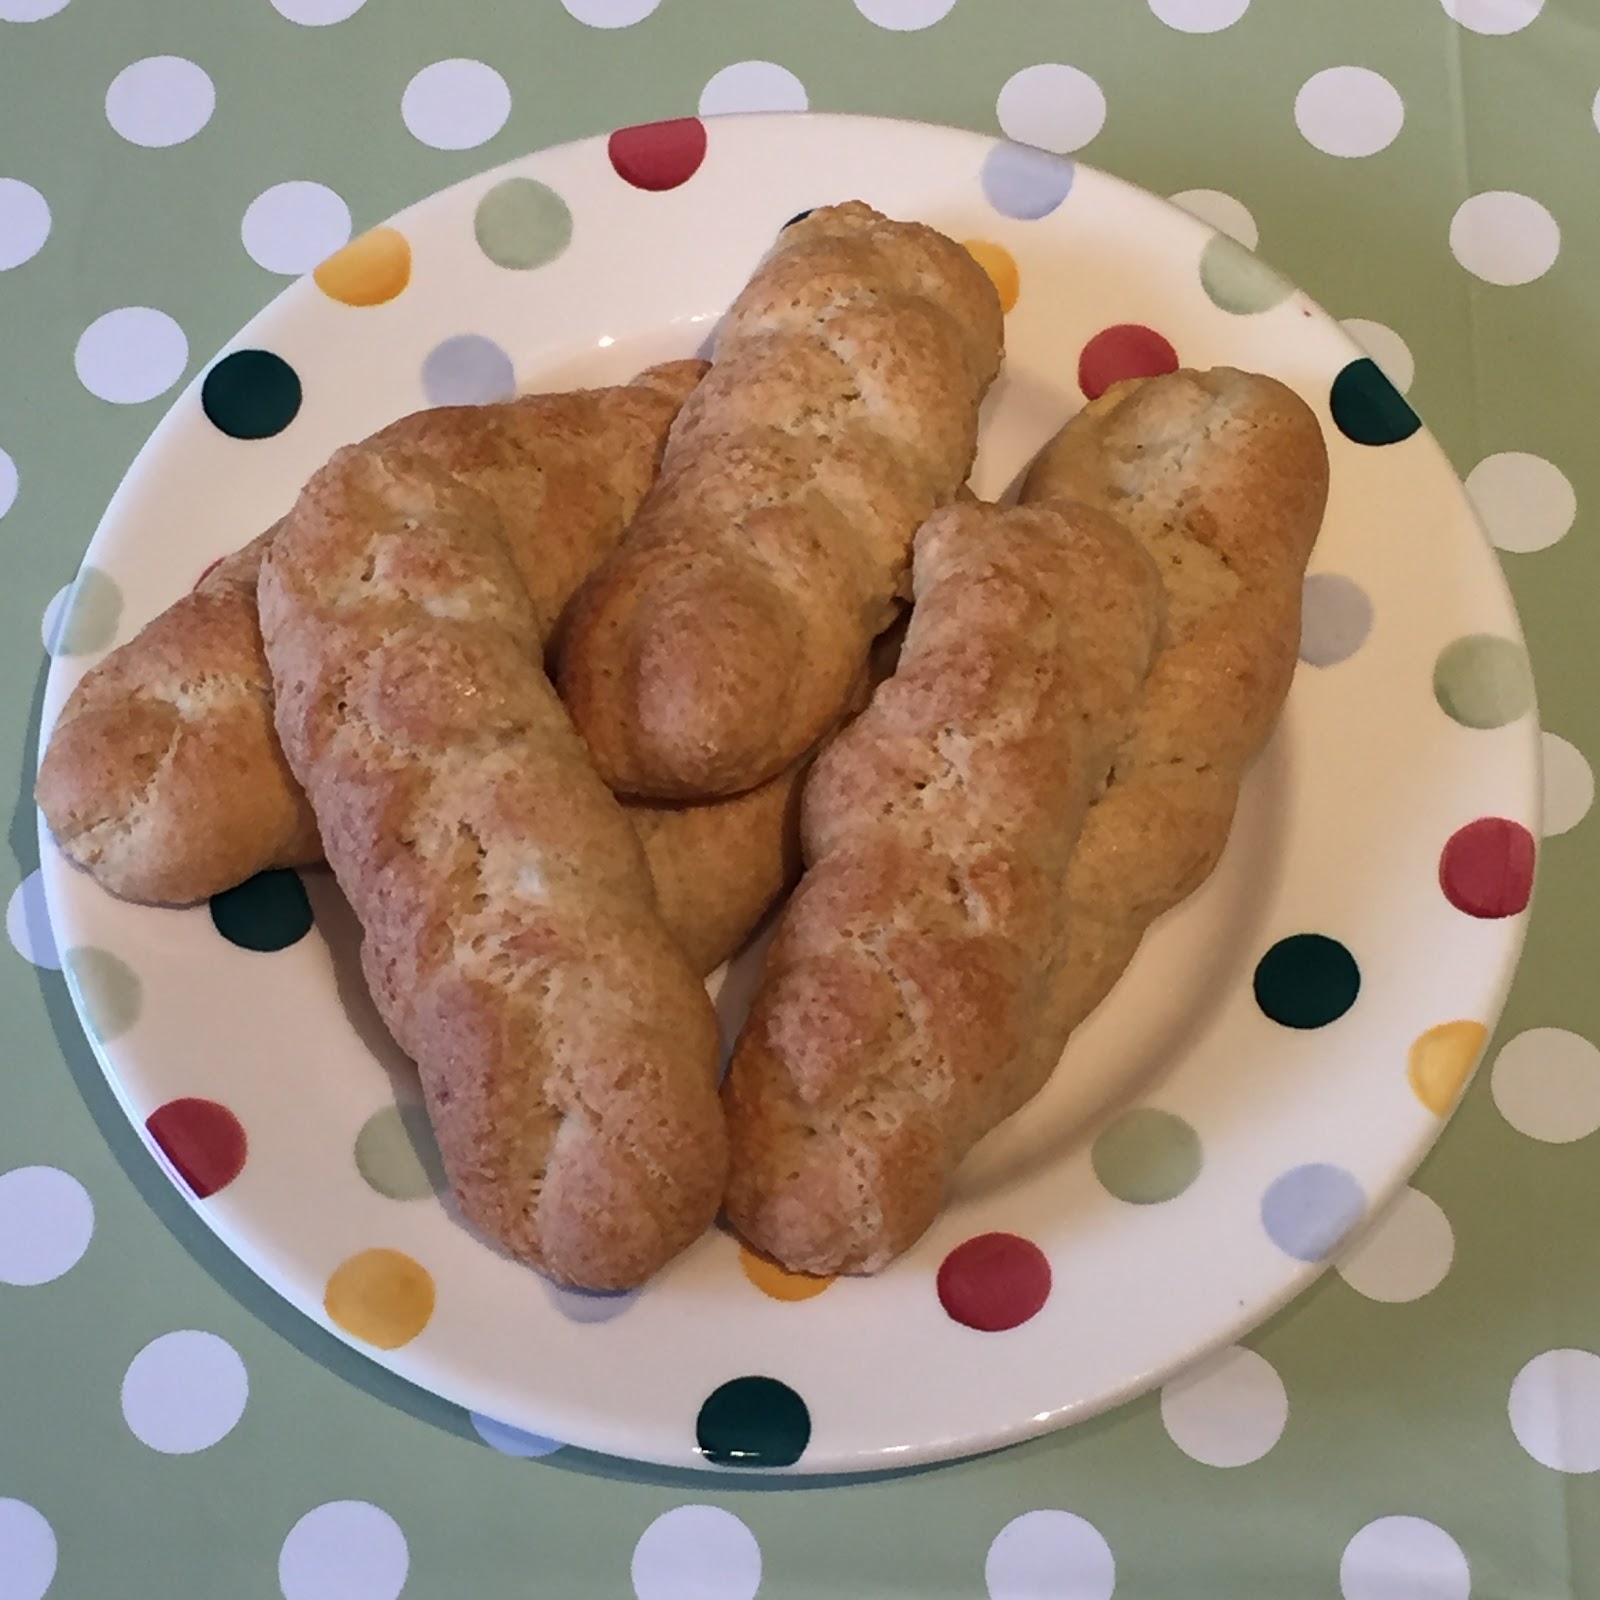
I wasn't looking forward to ANY of the challenges this week :( Decided to do jumbles as it was the least work (and I was actually really happy with them!) There was no way I was going to have time to do pies or a marchpane centrepiece - especially as I was catching up two challenges in one day! They turned out really well and were very similar to bagels. They have an unusual flavour, more savoury than sweet, and would taste beautiful dipped in a sweet sauce e.g. chocolate, white chocolate, fruit sauce or caramel! I think they would be lovely at Christmas time, maybe filled with mincemeat. :) I chose a slightly different recipe than the "official" one as (are we sensing a theme here??) I didn't have the right ingredients and could not be bothered to go traipsing around specialist shops searching for them - life is way too short!
Full recipe here - http://www.bbcgoodfood.com/recipes/spice-vanilla-jumbles
Ingredients
- butter for greasing
- 400g self-raising flour
- 150g golden caster sugar
- 2 large eggs, beaten
- ½ tsp mixed spice
- ¼ tsp vanilla extract
- icing sugar for dusting (optional)
Step One: Make the Dough
Sift the flour and your chosen spices together in a bowl (I used ginger and cinnamon). Stir in the sugar, vanilla, egg and 50ml of water. Bring the dough together and knead, adding a tiny bit more water if necessary.
Step Two: Shape and Boil the Jumbles
Grease two baking trays and pre-heat the oven to 180C (160C fan). Flour your worktop and tip the dough out. I cut mine into 16 pieces and tried a variety of shapes - knots, twists and plaits. My favourite was the plaits - they looked really professional. Boil the jumbles in water until they float then use a slotted spoon to scoop them out.
Shake off the water and lay them on the prepared tray.
Step Three: Bake the Jumbles
Bake the jumbles for 20-25 minutes until golden brown.
Leave to cool on the tray. Dust with icing sugar or serve with a sweet sauce.
My score: 4/5 They were MUCH better than I thought they would be! Loved shaping them and it made me want to make bread. I probably wouldn't make them again though, apart from maybe at Christmas time.
Julia's Top Tips
- Very easy to make. Make sure you don't use too much flour when kneading and shaping or the dough becomes very dry and tough.
- Try serving with jams or sweet sauces.
- Experiment with different spices and flavours.
- If you enjoy making these, try making bagels - very similar method!
Keeeeeeeep baking!
Sunday, 16 October 2016
Week Seven: Marjolaine
This was probably the most difficult challenge yet - but also the one I was most proud of! I was very pleased with the way it turned out, I think it is my most professional looking bake so far. I couldn't source all the ingredients (couldn't find slivered pistachios ANYWHERE) but I still think it looks and tastes amazing.
Full recipe here - http://www.bbc.co.uk/food/recipes/marjolaine_71611
Ingredients
For the dacquoise
- 125g/4½oz blanched almonds
- 125g/4½oz blanched hazelnuts
- 300g/10½oz caster sugar
- 25g/1oz cornflour
- 6 large free-range egg whites (reserve the yolks)
For the chocolate ganache
- 270ml/9½fl oz double cream
- 360g/12½oz plain chocolate, 46% cocoa solids, broken into pieces
For the praline
- 300g/10½oz caster sugar
- 100g/3½oz blanched almonds (I used pecans)
For the buttercream
- 225g/8oz caster sugar
- pinch cream of tartar
- 8 free-range egg yolks
- 350g/12oz unsalted butter, slightly softened, cut into pieces
To assemble
- 150g/5½oz flaked almonds
- 50g/1¾oz hazelnuts, chopped
- 50g/1¾oz pistachios, slivered (could not find anywhere so did not use!)
Method
Step One: Make the Dacquoise
I don't want to blow my own trumpet, but I'm pretty damn good at meringue! Never made one with nuts before but it was the same basic process. You can grind the nuts in the food processer, however I bought them ready ground! Spread them on a baking tray (in baking paper) and roast in the oven at 180C (160C fan) for 10 minutes until brown. Stir periodically do they don't burn! Leave them in a bowl to cool then add 100g of the caster sugar and all the cornflour.
While the nuts are cooling, whisk the egg whites in a very clean bowl on a medium speed for 2 minutes ish until white and frothy. Increase the speed then slowly add the rest of the caster sugar, a tablespoon at a time. The egg whites will turn beautifully white and glossy and you should be able to turn the bowl upside down! Finally, fold in the nut mixture - be careful not to lose any of the volume. Split the meringue between 2 swiss roll tins. (I didn't have 2 so I put it in my square cake tin with dividers instead, but that meant I only had 3 layers instead of 4) Reduce the oven temperature to 150C (130C fan) and bake for 45 - 60 minutes until light brown and firm. Switch the oven off but leave the meringue in with the door open until completely cool.
Step Two: Make the Ganache
Another thing I find very easy (probably why I enjoyed this bake so much!) Super easy just break the chocolate into a bowl, then heat the cream in a saucepan until simmering. Then pour the cream over the chocolate and stir until smooth. Leave to cool so it will be thick enough to pipe.
Step Three: Make the Praline
I didn't have enough almonds in the cupboard (I know - I'm awful!) so I made a pecan praline instead. I failed on my first attempt because I heated the mixture too quickly. You have to be incredibly patient and wait until the sugar mixture is almost clear before turning up the heat. This is what my first attempt looked like...
Pour the water and sugar into a saucepan and swirl to mix. Heat on a very low heat and occasionally swirl. (While this is going on, toast your chosen nuts in a frying pan and set aside on some baking paper on a baking tray.) When the sugar is COMPLETELY dissolved, then - and only then! - turn the heat up and boil the mixture until golden brown. DO NOT STIR!! Watch it like a hawk or it WILL burn. When it is ready, pour the caramel over the prepared nuts and leave to set. When it is set, whizz it up in a food processor into a fine powder.
Step Four: Make the Buttercream
I have NEVER made buttercream in this way! Pour 5 tablespoons of water, the sugar and the cream of tartar into a saucepan and melt in the same way as for the caramel. When the mixture reaches the "soft ball stage", which means that when a small amount is put into cold water, you can form a soft ball with it (see this website for an excellent description of what that is https://www.exploratorium.edu/cooking/candy/sugar-stages.html ) whisk the egg yolks in a seperate bowl. Gradually pour in the sugar syrup, whisking constantly. Whisk for about 5-10 minutes until thick. When the mixture is cool, gradually add the soft butter and whisk til combined. Fold in the praline powder and cool until needed.
Step Five: Marjolaine Assemble!
Toast your choice of nuts for decorating in a frying pan (I only used flaked almonds because that's what I had in the cupboard!). Trim your dacquoise sheets so that you have four equal sized sheets (as I said before I only had three sheets). Place one sheet onto your serving plate and spread with 1/4 of the praline buttercream. Top with a second sheet and 1/3 of the ganache. Then another sheet and another 1/4 of the buttercream. Finish with another sheet of meringue (if you have it!) Cover the whole stack with the rest of the buttercream and cover the sides with the toasted nuts. Spoon the remaining ganache into a piping bag with a star nozzle. Pipe the ganache around the edge of the top, then in 7 diagonal lines across the top. Fill the gaps with more nuts.
My score: 4/5 Stunningly beautiful and very impressive but reasonably tricky and time-consuming. An excellent showstopper for a dinner party but I will probably never make it again! However, I am very proud with this and I feel I really achieved something amazing :)
Julia's Top Tips
- Make sure your bowl is really clean before you make the meringue to achieve a really beautiful, snowy-white meringue.
- Buy a sugar thermometer! Really ensures accuracy in heat and I struggled without one.
- Use any nuts you like - doesn't need to be the particular one in the recipe.
- Make sure the sugar is completely dissolved before turning up the heat - BE PATIENT
- Experiment with different flavours - white chocolate and raspberry would be amazing!
Keeeeeeeep baking!
Week Six: Fougasse
I was planning on making a Mojito meringue pie for botanical week, but I just didn't have time! Ended up making fougasse instead, as it is my neighbour's favourite bread - and I've heard it makes a great cinema snack ;)
I used Paul Hollywood's recipe - http://www.bbc.co.uk/food/recipes/fresh_herb_fougasse_70351
Step Two: Shape the Dough
Paul says to dust your work surface with white flour and semolina. As you've probably guessed, I did not have semolina, so I just used white flour - it was fine. Tip out the dough and split in half. Lift each half onto a baking tray and shape into an oval. Paul suggests using baking paper underneath each 'loaf' but I had run out so I sprayed my trays with olive oil and dusted them lightly with flour. Use a pizza cutter to cut slashes into the dough - there are lots of different designs. You can see my one in the picture below. After you've slashed the dough, stretch it out very slightly, or the holes will close whilst baking. If you have large plastic proving bags, place your bread inside. I didn't, so I sprayed cling film with olive oil and laid that on top of my bread. Prove for another 20 minutes and preheat the oven to 220C (200C fan).
My score: 5/5 Easy peasy simple pimple! Absolutely delicious and the easiest bread I have ever made. Makes soup and bread a meal fit for a Queen. You do need to be in the house most of the day because of timings and proving etc but it's a lovely recipe to do while you're getting on with other things because it only requires about 20 minutes of actual action.
Julia's Top Tips
I used Paul Hollywood's recipe - http://www.bbc.co.uk/food/recipes/fresh_herb_fougasse_70351
Ingredients
- 500g/1lb 2oz strong white bread flour, plus extra for dusting
- 10g/¼ fine salt
- 7g sachet instant yeast
- 2 tbsp olive oil, plus extra for greasing and drizzling
- 350ml/12fl oz warm water
- 2 tsp chopped fresh rosemary, plus extra to finish
- 2 tsp chopped fresh thyme
- 2 tsp chopped fresh sage
- fine semolina, for dusting
- ½ tsp dried oregano
- sea salt flakes, crushed, to finish
Method
Step One: Make the Dough
Put the flour salt and yeast in the bowl of your free-standing electric mixer with a dough hook. Make sure the salt and yeast are on opposite sides of the bowl. (If you don't have an electric mixer, you can always knead by hand) Add the olive oil and 3/4 of the water and begin to mix on a low speed. As the dough comes together, add the rest of the water and continue mixing for about 8 minutes. Add the herbs (as usual, I did not have all the herbs and couldn't be bothered to go shopping! I used herbs from my garden) Mix for a minute or two until the herbs are evenly spread through the dough and the dough is stretchy and elastic. Oil a large bowl and tip the dough in. Turn the dough over (so the oiled side is up) and cover the bowl with clingfilm - if the oily side is up, then the clingfilm will not stick to the dough. Leave to rise until doubled in size - at least an hour.
Step Two: Shape the Dough
Paul says to dust your work surface with white flour and semolina. As you've probably guessed, I did not have semolina, so I just used white flour - it was fine. Tip out the dough and split in half. Lift each half onto a baking tray and shape into an oval. Paul suggests using baking paper underneath each 'loaf' but I had run out so I sprayed my trays with olive oil and dusted them lightly with flour. Use a pizza cutter to cut slashes into the dough - there are lots of different designs. You can see my one in the picture below. After you've slashed the dough, stretch it out very slightly, or the holes will close whilst baking. If you have large plastic proving bags, place your bread inside. I didn't, so I sprayed cling film with olive oil and laid that on top of my bread. Prove for another 20 minutes and preheat the oven to 220C (200C fan).
Step Three: Bake the Dough
Make sure the oven is heated to 220C (200C fan). Spray some olive oil over the top of each loaf and bake for 15-20 minutes. It will sound hollow if it's ready when you tap it. Remove from the oven, brush with more olive oil and sprinkle with the sea salt. Eat immediately!
My score: 5/5 Easy peasy simple pimple! Absolutely delicious and the easiest bread I have ever made. Makes soup and bread a meal fit for a Queen. You do need to be in the house most of the day because of timings and proving etc but it's a lovely recipe to do while you're getting on with other things because it only requires about 20 minutes of actual action.
Julia's Top Tips
- Don't worry if you don't have all the correct ingredients or equipment - improvise! The must haves are proper strong bread flour and yeast, otherwise it will not work.
- Experiment with different flavours - I think sundried tomato would be gorgeous, or cheese, or maybe even a sweet one like chocolate and caramel!
- A great beginner's bread if you've never made bread before.
Keeeeeeeep baking!
Tuesday, 11 October 2016
Barcelooooonaaa!
I'm a bit behind in my baking challenges because me and my brother jetted off to Barcelona for the weekend! It was beautiful weather, hot and sunny, and a wonderful way to round off the lovely September sunshine.
While I was there, I went on a Sweet Lovers walking tour, run by Food Lover Barcelona.
http://foodlovertour.com/barcelona/sweets-lover-tour/
The tours are always small, maximum of ten people per group, and our group only had 2! My tour guide was called Carla and she was wonderful! She took us around so many wonderful Barcelonan eateries and I was in heaven!
Some of my highlights were...
- http://www.vicens.com/en/ Torrons Viciens. They specialise in nougat, which is apparently a big thing in Barcelona! My favourite was a smooth almond nougat covered in egg yolk, a traditional Christmas treat. It was absolutely delicious! I bought some of that to save for Christmas as well as a chocolate/almond paste that I'm planning to use in brownies!
- http://www.caelumbarcelona.com/cielo/index.php?lan=eng Caelum. I had the most amazing hot chocolate here! It was so thick you had to eat it with a spoon and the little biscuitty sweet doughnuts to dip in it contrasted beautifully with the dark, rich chocolate. Apparently nuns do a lot of baking and sweet making in Barcelona - lots of the treats were made by nuns!
- http://www.pastisserialacolmena.com/en/ Dolceria de la Colmenia. Full of wonderful sweets and pastries! Absolutely delicious and I'd love to visit it again. So many to choose from - I could buy something different everyday for a year and still not try everything they had to offer!
- http://www.casagispert.com/en/about-us-casa-gispert/ Casa Gispert. Casa Gispert is like a beautiful deli, full of wonderful aromas and tasty treats. It sells spices, olive oils, tea, honey, wine, jams... But my favourite thing was the nuts! They are smoked in a traditional wood smoking oven, apparently the last one that smokes in this way in the world! I had the almonds and the hazelnuts - spectacular!
- http://www.hofmann-bcn.com/pasteleria Pasteleria Hofmann. This was my favourite because it was so artistic and creative! Cheesecakes disguised as camemberts, mousses disguised as eggs... I loved it! We had a stunning mascarpone filled croissant - something I must recreate!
- http://bubo.es/en/ Bubo. Last but definitely not least! Mirror glazed mousse cakes are their speciality - another thing I must recreate! Also bought some gorgeous raspberry filled dark chocolates...
Other finds...
- A must for Barcelona is churros! Here is Time Out's list of the best places to try... http://www.timeout.com/barcelona/food-and-drink/barcelonas-best-churros
- http://www.happypills.es/en/ Happy Pills is a fun, cheerful sweet shop where all the sweets are made to look like medicine!
- https://www.facebook.com/bechocolat/ Be Chocolat. A super fun chocolate shop, full to the brim with exciting, innovating chocolates. Lots of free tastes too!
- http://www.chocolatfactory.com This was actually at the airport! Lots of fun, shaped chocolate. While we were there, it was full of Halloween chocolates! :)
Baking inspiration...
- I'd love to recreate the mascarpone filled croissants - delish!
- I want to experiment with making things disguised to look like other things! I especially love the cheesecakes disguised as camemberts!
- Macarons - I know these are French but they are EVERYWHERE in Barcelona! On cakes, on mousses, on ice creams... EVERYWHERE!
- Meringue - stunning swirled meringues everywhere - I must improve my piping skills!
- Mirror glaze mousse cakes - these were also everywhere, I must have a go!
I fully recommend Barcelona! I had a wonderful time and I'm already planning a return visit! September/October is a gorgeous time to visit - English summer temperatures.
Caelum
Dolceria de la Colmenia
Pasteleria Hofmann
Bubo
Happy Pills
Subscribe to:
Posts (Atom)